
Setting up Firebase Redirect Auth on localhost with HTTPS
In 2024, browsers started blocking third-party storage access, requiring developers to update the signInWithRedirect() flow for Firebase social logins.
As the redirect docs suggest, one option is to switch to signInWithPopup(), which works instantly on localhost. But I like the redirect flow experience over popups, so what other option do we have?
The next simplest implementation from the docs is Option 3: Proxy auth requests to firebaseapp.com, which requires transparently forwarding requests from https://<app-domain>/__/auth/ to https://<project>.firebaseapp.com/__/auth/.
They show an Nginx reverse proxy config to achieve this, which is a perfect solution if you're planning to set up Nginx anyway. But, if you're deploying to a service that automatically handles load balancing, like Google App Engine, then we can skip creating a load balancer locally and handle the proxying at the application level.
The issue lies with how Firebase redirects back to your app and expects https. While testing on a live domain with SSL would work, the redirect flow on localhost will fail since https isn't on by default.
Thankfully, openssl lets us sign and produce our own certificates, which we can tell Chrome to trust.
So, to test locally and have https://localhost resolve without errors, we need to:
- Generate a self-signed certificate
- Tell our app to use the generated certificate and expect https connections
- Tell Chrome to trust the generated certificate
- Inform Google Cloud that localhost is a trusted domain and redirect URI
- Update our app to forward
/__/auth/requests to Firebase
Let's go through each step.
Get the code
Find the completed demo project from this tutorial on Github.
Resolving https://localhost
To demonstrate https on localhost, I'll show you how to generate an SSL certificate and apply it to a golang server. The certificate generation should remain the same regardless of your chosen server language.
Generate a certificate
We'll use openssl to generate our own certificate. Check if it's already installed by running openssl version in your terminal. If you need to install openssl, get it here.
Once your terminal has access to openssl, run the following command in your project's root directory to generate a self-signed certificate:
openssl req -x509 -newkey rsa:4096 -keyout localhost.key -out localhost.crt -sha256 -days 36500 -nodes -subj "/C=US/CN=localhost" -addext "subjectAltName = DNS:localhost"
This creates two files: localhost.key and localhost.crt. The key points of this command are CN (Common Name) and subjectAltName (SAN), which both tell the browser this certificate is intended for localhost.
SAN is the modern replacement for CN and is required for https to work on up-to-date browsers. If you missed this part you would see NET::ERR_CERT_COMMON_NAME_INVALID on localhost.
The last step is to tell our local Chrome browser to trust this certificate. If you don't do this, you'll get a net::ERR_CERT_AUTHORITY_INVALID warning in Chrome. Follow these steps to trust the new cert:
- In Chrome, go to chrome://certificate-manager/
- Click on Manage imported certificates from Windows, which launches the certificates Windows dialogue
- In the dialogue, go to the Trusted Root Certification Authorities tab
- Click Import and Browse for your
.crtwe generated in your project's root - Accept all of the remaining dialogues to add your certificate to the list
- Restart Chrome to detect the new cert
Once imported, all we need is a server that uses this cert to verify that https://localhost works. Let's do that next.
Golang https server
With our new SSL certificate, we need to create a golang server with http.ListenAndServeTLS() instead of http.ListenAndServe(). The TLS version is the same as the non-TLS, except for the localhost.crt and localhost.key file names.
package main

import (
    "github.com/gorilla/mux"
    "log"
    "net/http"
)

func main() {
    router := mux.NewRouter()

    router.HandleFunc(
        "/", func(w http.ResponseWriter, r *http.Request) {
            w.Write([]byte("Hello world"))
        },
    )

    err := http.ListenAndServeTLS(
        ":8082",
        "localhost.crt",
        "localhost.key",
        router,
    )
    if err != nil {
        log.Fatalf("Server failed to start. Error: %s", err)
    }
}
Run the server with go run main.go and you should now be able to navigate to https://localhost:8082 and see "Hello World" in Chrome without any errors or warnings. Again, if you see net::ERR_CERT_AUTHORITY_INVALID, you most likely need to restart Chrome.
If you're a tab hoarder like me and hate restarting Chrome, you could install Chrome Beta and keep it empty for testing stuff like this.
Non-https no longer works
This is a dev setup that will not automatically redirect http to https. Opening http://localhost will result in the error: client sent an HTTP request to an HTTPS server.
In production, you would typically handle this with a load balancer, like nginx, or by running a separate http server that redirects all requests to https.
Next, we'll implement a minimal frontend client to handle the Firebase social login.
Firebase social login
The Firebase docs have javascript snippets for almost everything you need, so I'll pull directly from their examples.
Showing the login button
To make a properly designed social login button for Google, go to their branding guidelines, design a button, and click "Get Code". This will give you the html/css to render a branded button.
The following is the generated button code:
<!DOCTYPE html>
<html>
<head>
    <link rel="stylesheet" href="/static/style.css">
    <script src="/static/main.js"></script>
</head>
<body>
<div>
    <!-- from https://developers.google.com/identity/branding-guidelines -->
    <button class="gsi-material-button">
        <div class="gsi-material-button-state"></div>
        <div class="gsi-material-button-content-wrapper">
            <div class="gsi-material-button-icon">
                <svg version="1.1" xmlns="http://www.w3.org/2000/svg" viewBox="0 0 48 48"
                     style="display: block;">
                    <path fill="#EA4335"
                          d="M24 9.5c3.54 0 6.71 1.22 9.21 3.6l6.85-6.85C35.9 2.38 30.47 0 24 0 14.62 0 6.51 5.38 2.56 13.22l7.98 6.19C12.43 13.72 17.74 9.5 24 9.5z"></path>
                    <path fill="#4285F4"
                          d="M46.98 24.55c0-1.57-.15-3.09-.38-4.55H24v9.02h12.94c-.58 2.96-2.26 5.48-4.78 7.18l7.73 6c4.51-4.18 7.09-10.36 7.09-17.65z"></path>
                    <path fill="#FBBC05"
                          d="M10.53 28.59c-.48-1.45-.76-2.99-.76-4.59s.27-3.14.76-4.59l-7.98-6.19C.92 16.46 0 20.12 0 24c0 3.88.92 7.54 2.56 10.78l7.97-6.19z"></path>
                    <path fill="#34A853"
                          d="M24 48c6.48 0 11.93-2.13 15.89-5.81l-7.73-6c-2.15 1.45-4.92 2.3-8.16 2.3-6.26 0-11.57-4.22-13.47-9.91l-7.98 6.19C6.51 42.62 14.62 48 24 48z"></path>
                    <path fill="none" d="M0 0h48v48H0z"></path>
                </svg>
            </div>
            <span class="gsi-material-button-contents">Sign in with Google</span>
            <span style="display: none;">Sign in with Google</span>
        </div>
    </button>
</div>
</body>
</html>
We're almost ready to view the button. We need to tell our golang route to render the index.html template and how to find our static assets.
I've moved the routing out of main.go and into a router.go file:
package main

import (
    "github.com/gorilla/mux"
    "html/template"
    "log"
    "net/http"
)

func router() http.Handler {
    r := mux.NewRouter()

    // Serving css/js
    fs := http.FileServer(http.Dir("./assets"))
    r.PathPrefix("/assets/").Handler(http.StripPrefix("/assets/", fs))

    r.HandleFunc("/", handleIndex)
    return r
}

func handleIndex(w http.ResponseWriter, r *http.Request) {
    tmpl, err := template.ParseFiles("templates/index.html")
    if err != nil {
        log.Printf("error parsing template: %s \n", err)
        http.Error(w, "Server Error", http.StatusInternalServerError)
        return
    }
    err = tmpl.Execute(w, nil)
    if err != nil {
        log.Printf("error executing template: %s", err)
        http.Error(w, "Server Error", http.StatusInternalServerError)
        return
    }
}
If you go to https://localhost:8082 you should see the following button:
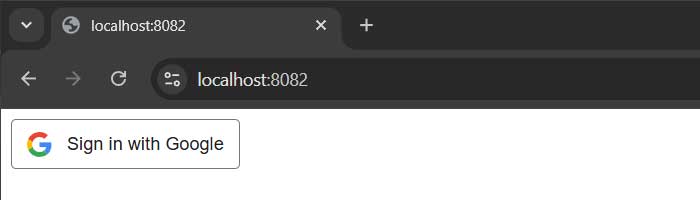
Default Google social login button
Note: I'm serving css/js from the /assets folder. In the next section, we'll change this to /static when we use a bundler to install Firebase.
Next, we'll wire the button to call Firebase's redirect login flow.
Installing firebase
For this guide, I'm assuming you've already created a Firebase project and registered your app. If not, follow the first step here.
Next, we need to install Firebase with npm. If you already have a bundler, you can run:
If you need a bundler, expand and follow the next block.
Setting up a minimal bundler
This section will show you how to set up a minimal esbuild script for bundling js. To keep it simple, it won't include options like compiling scss, handling images, and syncing with the browser. AI can easily help build in more features if you need them.
To start, we'll create two files:
1. package.json - for defining our config, dependencies, and commands
2. build.js - the script for importing and bundling our scripts and dependencies into one file
These two files allow us import the Firebase js library into our main.js.
Now install esbuild and Firebase:
Since I'm bundling to the static/ folder, I'll need to update a few references to change from "assets" to "static":
If you followed this step, you should be able to refresh localhost and see everything works like before.
Configuring and initializing Firebase in your app
The Firebase js config requires a few values unique to your Firebase project. The easiest way to get the config code for your project is to go into your project settings in Firebase console (https://console.firebase.google.com/) (see image).
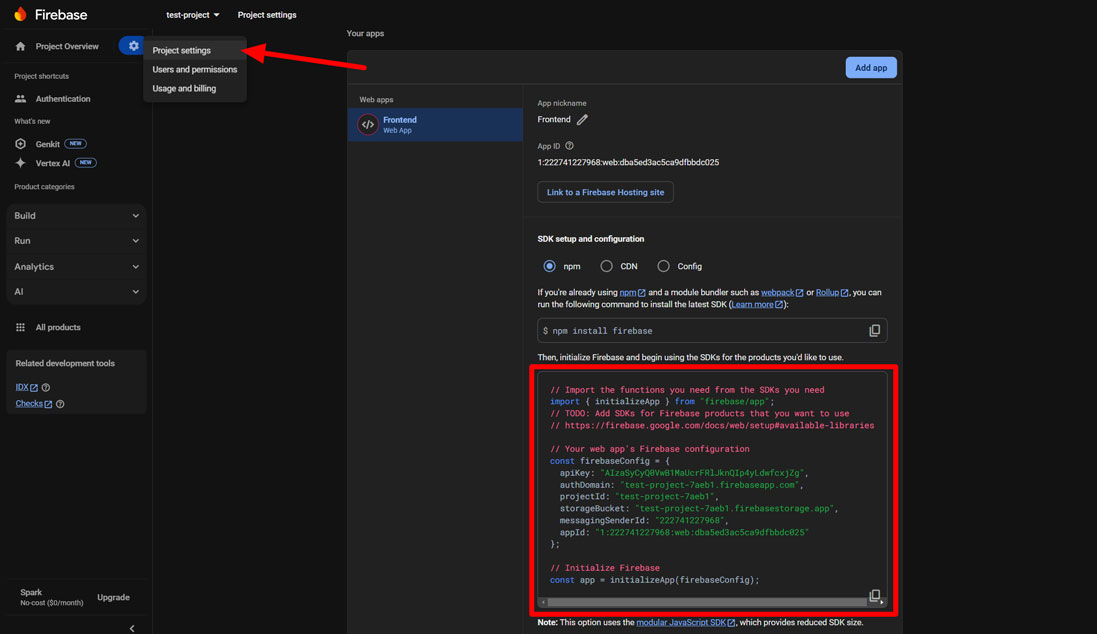
Location of Firebase project config code
If you don't see your config code, you'll need to follow the steps to create a new web app for your project.
For version control purposes, I'm placing the config values in firebase-config.js and importing them into main.js:
Assuming your bundler is set up correctly, you should be able to visit localhost with zero errors.
Setting up the redirect
Now that we have an app, we'll use the redirect code directly from the Google sign-in docs. I'll show vanilla js instead of a framework to make it easy to apply to your own project.
First, you need to make sure you've created an app in your Firebaes project and enabled Google SignIn (see slides).
If you skip this step you'll see the error Uncaught (in promise) FirebaseError: Firebase: Error (auth/configuration-not-found). in Chrome console.
From the docs, we only need to import and initialize an auth and provider, then trigger the redirect function with our button.
import { initializeApp } from 'firebase/app';
import { firebaseConfig } from "./firebase-config";
import {
    getAuth,
    GoogleAuthProvider,
    signInWithRedirect
} from "firebase/auth";

const app = initializeApp(firebaseConfig);
const auth = getAuth();
const googleProvider = new GoogleAuthProvider();

window.App = {
    googleSignInRedirect() { // (1)!
        signInWithRedirect(auth, googleProvider);
    }
}
- Sign in button triggers this function on click
If you reload localhost and click the sign-in button, you can follow the familiar Google sign-in redirect flow and end up back on localhost.
If you're on a newer browser, you may see a permission request like this:
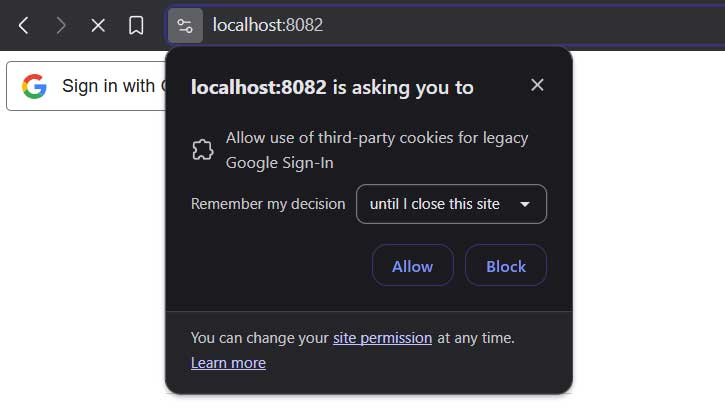
As mentioned in the intro and in the redirect docs, this warning will be displayed for all users because browsers now disallow third-party storage access.
We'll fix this problem in the next section by proxying auth requests from our domain (Option 3 in the docs).
Proxying auth requests
In golang, we need to add a route and handler that creates a reverse proxy for any request to /__/auth/.
Here's a basic setup:
func router() http.Handler {
    r := mux.NewRouter()

    r.PathPrefix("/__/auth/").HandlerFunc(firebaseAuthProxy)

    fs := http.FileServer(http.Dir("./static"))
    r.PathPrefix("/static/").Handler(http.StripPrefix("/static/", fs))

    r.HandleFunc("/", handleIndex)
    return r
}


func firebaseAuthProxy(w http.ResponseWriter, r *http.Request) {
    firebaseProject := "<your-firebase-project-id>" // (1)!
    target, _ := url.Parse("https://" + firebaseProject + ".firebaseapp.com")
    proxy := httputil.NewSingleHostReverseProxy(target)

    r.URL.Host = target.Host
    r.URL.Scheme = target.Scheme
    r.Header.Set("X-Forwarded-Host", r.Header.Get("Host"))
    r.Host = target.Host

    proxy.ServeHTTP(w, r)
}
- This should be your Firebase config's
projectIdfield.
This ensures requests to localhost:8082/__/auth/ will reverse proxy to https://<firebase-project-id>.firebaseapp.com/__/auth/.
For this to redirect back to localhost with the user's login info, we need to add localhost to the list of authorized redirect URIs in the Firebase service account.
Adding localhost as an authorized redirect URI
Go to:
https://console.cloud.google.com/auth/clients?project=<your-firebase-project-id>
Click on the "Web client", and add localhost to "Authorized redirect URIs" (see slides).
Now that our project trusts localhost redirects, we can handle the redirect result and capture the user's logged-in user's information.
Handling the redirect result
After a user completes a social sign-in and is redirected back to your app, you'll need to call getRedirectResult() when your app initializes.
This part can result in some subtle errors due to the timing of how content and libraries are loaded, but here, we're just going to call an init() when the DOM loads.
import { initializeApp } from 'firebase/app';
import { firebaseConfig } from "./firebase-config";
import {
    getAuth,
    GoogleAuthProvider,
    signInWithRedirect,
    getRedirectResult
} from "firebase/auth";

// ...

window.App = {
    async init() {
        await this.handleRedirect()
    },
    async handleRedirect() {
        try {
            const result = await getRedirectResult(auth)
            if (result == null) return

            const credential = GoogleAuthProvider.credentialFromResult(result);
            const token = credential.accessToken; // (1)!
            const user = result.user;

            const idToken = await user.getIdToken(true) // (2)!

            console.log("USER: ", user, "\nACCESS TOKEN: ", token, "\nID TOKEN: ", idToken)

        } catch (error) {
            console.log(error) // (3)!
        }
    },
    googleSignInRedirect() {
        signInWithRedirect(auth, googleProvider);
    }
}

document.addEventListener("DOMContentLoaded", async () => {
    await App.init()
})
- Use this token to access provider APIs
- Send this token to your backend for verification
- There are lots of error cases we could handle here. Ask AI to help and see https://firebase.google.com/docs/auth/admin/errors
We've created an async init() to check if we have a redirect result when our app is loaded. From the result, we get the user's info and an access token, which we can use to access authorized Google's APIs on behalf of the user.
The user's idToken is a JWT that you'll send and verify with your backend using the Firebase Admin SDK. Once validated, you can safely store the user in your database and add them to a session.
In firebase-config.js we need to set the authDomain to our app's localhost address, which is what the reverse proxy to /__/auth/ was set up to handle. A more sustainable solution would be to extract these values to env variables and switch the authDomain depending on our environment (local vs. production). I'm leaving it like this for the demo so there's less code to look at.
Either way, if you now reload localhost and go through the social login flow, you should see Chrome console print a user object and access token.
Next steps
We have a fully functioning Google sign-in redirect flow, but we've only logged the user, access token, and ID token on the frontend. For my apps, I usually have a golang backend and a postgres database, so the next step would be to verify and store the user on the backend. Once verified, I then add their credentials to a session that gets passed back and forth with requests.
Feel free to look through this tutorial's full code on GitHub and let me know of any issues or improvements.